
Welcome to part 2 of the zone system. If you missed it, last week in part 1 we talked about exposing for detail and how you should meter for the type of camera you are using to allow you to see through to your envisioned final product. In this week’s post we’ll be pushing forward to the next step in seeing through your envisioned photograph.
The original system included ten zones in which there was a full range from pure black to pure white. This was represented by zones 0 through to X, where 0 is black and X is white. However, inside this is there are two smaller ranges, the dynamic range being comprised of zone I to IX, and the textural range being comprised of zone II to VIII.
The dynamic range (from I to IX) is often talked about in photography as it is the total range of as Ansel Adams called it “useful” light. This can be different for different fill types (or stocks) or for different sensors. This difference is why there is no real one rule for the zone rule and you will have to work out your own range and how to expose for each zone because for each range there can be a varying difference in the exposure between zones. Though these days digital cameras like the Sony A7s range are being made with sensors that can have incredibly large dynamic ranges to give you the best results possible.
The textural range (from II to VIII) is the range of light where texture can be recognised and is needed to give a recognition of substance in an image, as opposed to plain (smooth) whites or blacks. This range is where you should keep your focus points, or anything you want a viewer to look at as they will be able to recognise objects in this range.
Here is a little table you can save and look at later with Ansel Adams full range and a descriptor of each.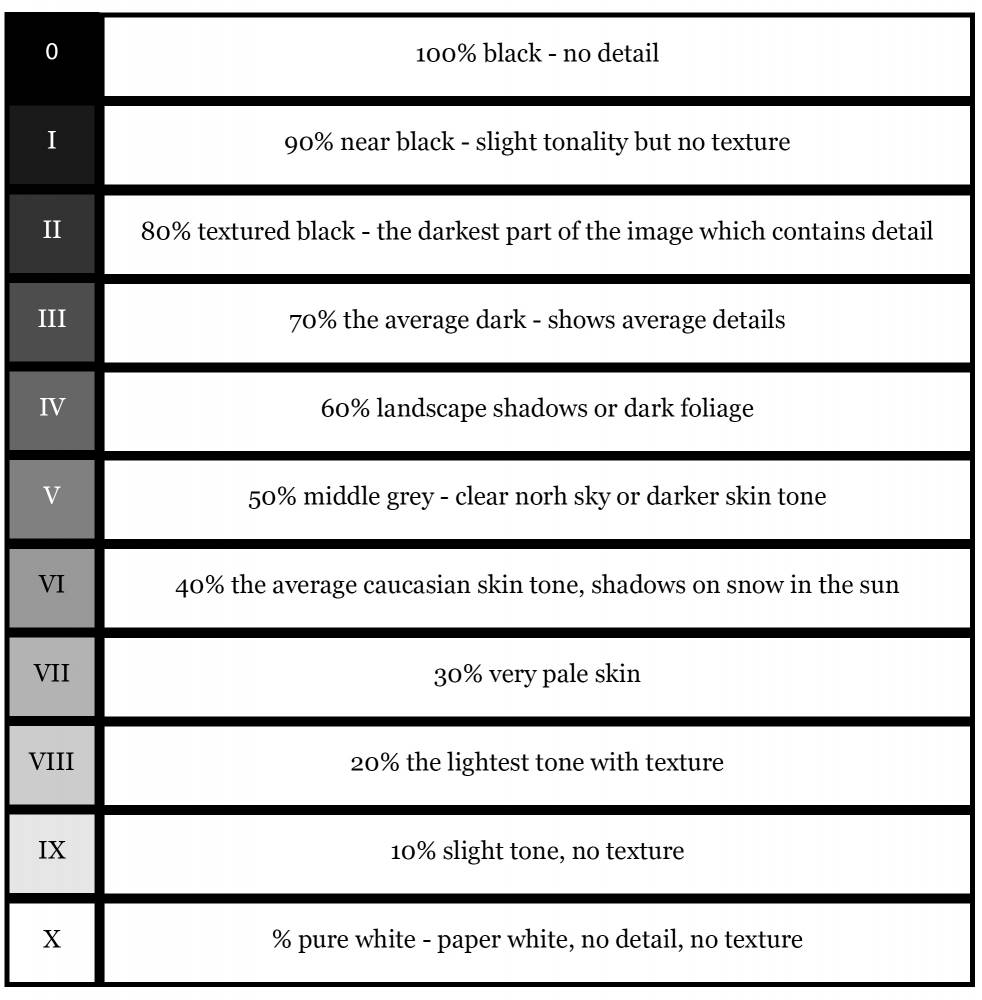
Now it’s not always going to be possible to use the full range in one photo, especially in low contrast scenes, but where possible it is encouraged. Having a print or final image that can show the full range of tonal values helps create depth and interest in different areas of an image. Here, the contrast tool in Lightroom or on your iPhone can be helpful in making your images more interesting. It works by shortening the dynamic range of the image and creating more shadows and highlights within an image. The Film Supply club has a good instructional video on taking images with this system in mind you can check out here.
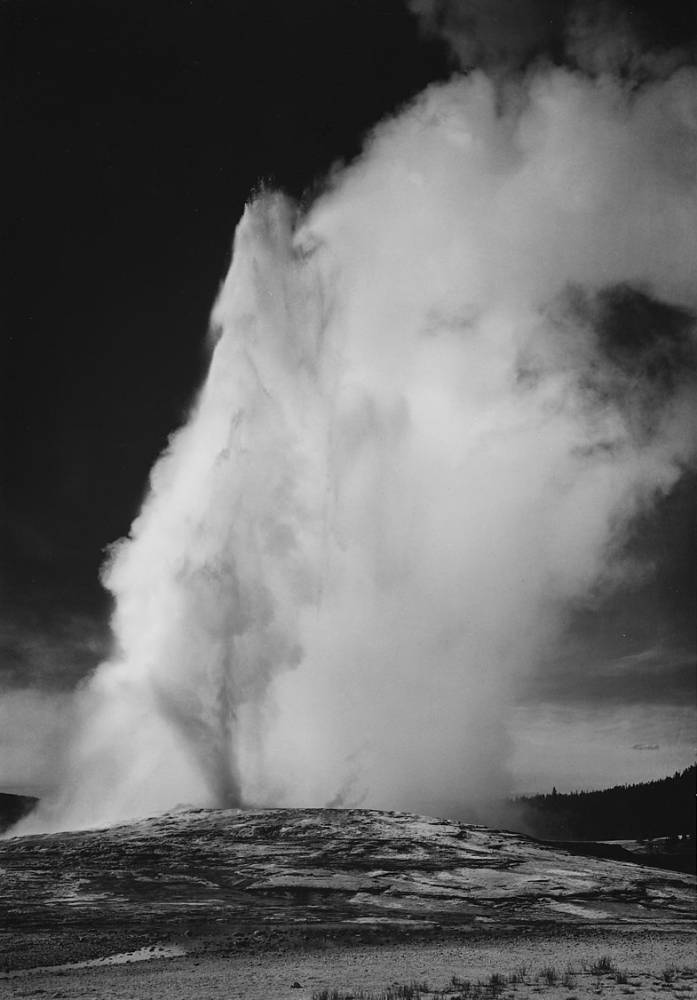
Now that you have an understanding of the system, as a little exercise pick an image of your own and try and identify different zones within it and see how many you covered, or take a look at one of Ansel Adams’ photos here.
For more information on the zone system, you can also visit Ken Rockwell’s site here, or leave a comment and let us know what you’d like to know. You can even take a photography course with us at PhotoCo Adelaide where we’d be more than happy to teach you all the tips and tricks we know.


