
Photography is an incredibly wide medium in the creative space. It can be as simple as a passport photo, as in the moment as a sports photographer, as influential as a cover photo, or as expressive as your favorite painter in a museum. The broadness of it comes from the huge range of creative and productive techniques available within the medium which can turn a seemingly boring tool into a painter’s brush. Multiple exposure’s are one of those techniques which can turn a standard photo into a work of art.
One of my favorite photographers who wields this technique well is Christoffer Relander, have a look at his Instagram or website for some amazing examples of how you can turn simple photos into art.
So what is this elusive and complex technique I hear you ask. Well its really quite simple, you simply take more than one photo at once. Well not quite that simple. On film this means taking multiple photographs without advancing the film or on the same segment of film. For example the photograph below was created by putting a full roll of film through a studio shoot before putting it back into the camera to reshoot the roll, mixing the first exposure from the studio with the neon light in the second exposure, to create the final image.
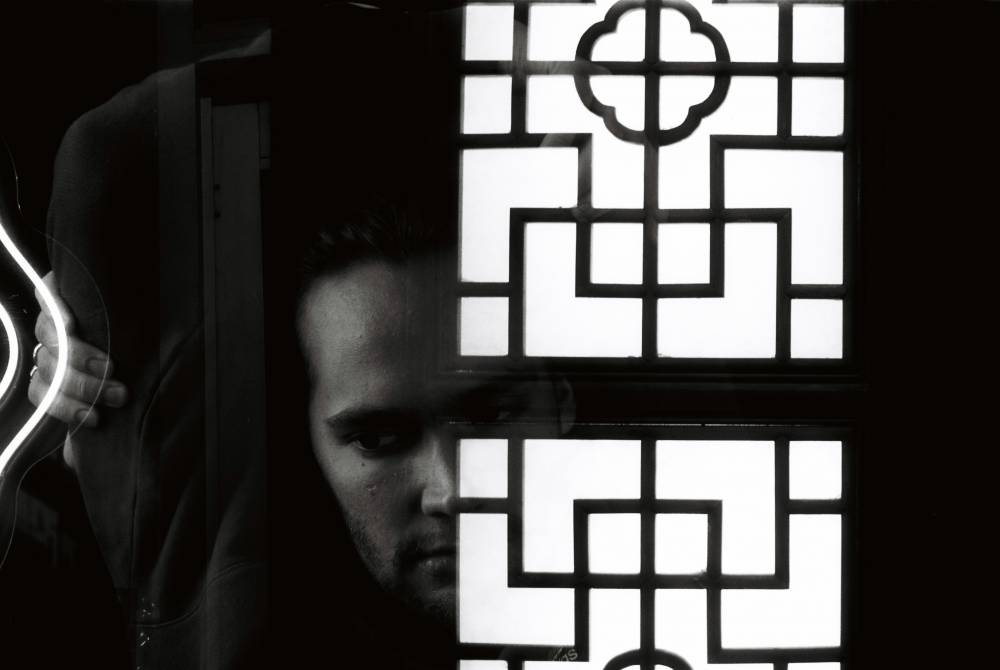 Taken by Henry of Ben on a Nikon F5
This image on the other hand was actually an accidental double exposure where the camera did not advance the film correctly, exposing the same section twice creating an arguably more interesting image than the intended one.
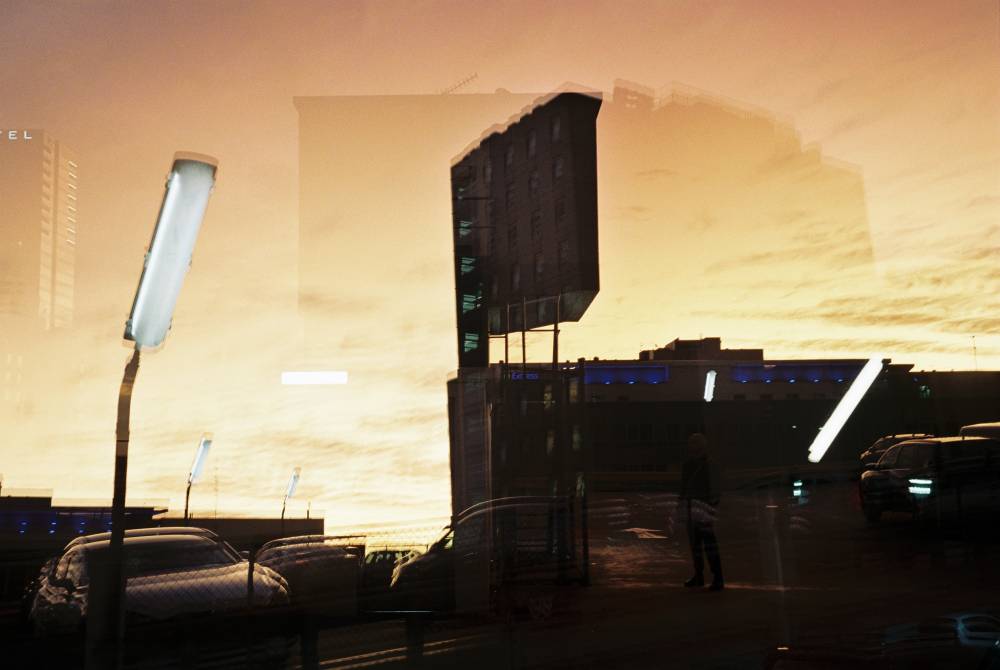 Taken by Ben on a Nikon 35ti
This affect can also be created in a digital camera, having the camera merge two or more photographs together, however it is more commonly done outside of the camera as you can be more precise in choosing what exposures go well together as well as being able to change the weighting of each photo, making one stand out more than another, as well as many other tinkering tricks that can be performed in photoshop or an equivalent program.
So now you know how to do this, what can you do to make your exposures stand out? Well, one thing that you can see in the photographs of Chris Relander and in the fist image in this blog is that the images were taken with the intent of a double exposure in mind. Both of these use extreme light and dark lighting in the images (using each end of Ansell Adams zone system you can check out here), to allow a space for the effects to shine through. In my version creating a dark area for the lights to shine through around the subject and in Chris’s using the dark shadows on his subjects to bring textures from the environment around him on to them. But theses are just two examples, and it is an incredibly open-ended skill which leaves room for interpretation. So get out their and try it, there are no wrong answers in how to use this technique. So give it your own twist and try something new.
For more information tips and tricks, you can also check take lessons with our skilled instructors at PhotoCo. Check them out here or head to our socials for any deals or promotional lessons we may be running.


